📚 This is a How-To Guide – You already have a working BrowserAct workflow, and you want to trigger it from Make. This guide shows you how. ⏱️ Estimated time: 15-20 minutesDocumentation Index
Fetch the complete documentation index at: https://docs.browseract.com/llms.txt
Use this file to discover all available pages before exploring further.
🎯When Should You Use This?
Use this guide if you want to:- Trigger a BrowserAct workflow from a schedule – Run daily, every hour, on specific days, etc.
- Trigger from external events – Webhook, form submission, API call, etc.
- Use data from other platforms – Google Sheets, Airtable, email, Salesforce, etc.
- Send results to downstream tools – Email, Slack, database, CRM, Airtable, Notion, etc.
- Build end-to-end automations – Data source → BrowserAct → Results → Action
❌ You DON’T Need This If…
You just want to run a workflow manually in BrowserAct. That’s already easy – just click “Run”!✅ Prerequisites
✓BrowserAct Account + Working Workflow ✓Go to BrowserAct → Workflows → pick one that’s Published and testedYour API Key Ready
✓In BrowserAct: Settings → Integrations & API → “Generate API Key” → Copy itMake Account (Cloud)
✓Make is cloud-only – sign up at make.com if you haven’t alreadyBasic Make Knowledge
Know how to add modules and create basic scenarios in Make🔄How It Works (Visual Overview)
Your Data Source (Sheets, Webhook, Schedule, Airtable) ↓ Make (Decides WHEN to run & WHERE data comes from) ↓ BrowserAct (Runs your web automation workflow) ↓ Results (Structured data back to Make) ↓ Your Destination (Email, Slack, Airtable, Notion, Database, etc.)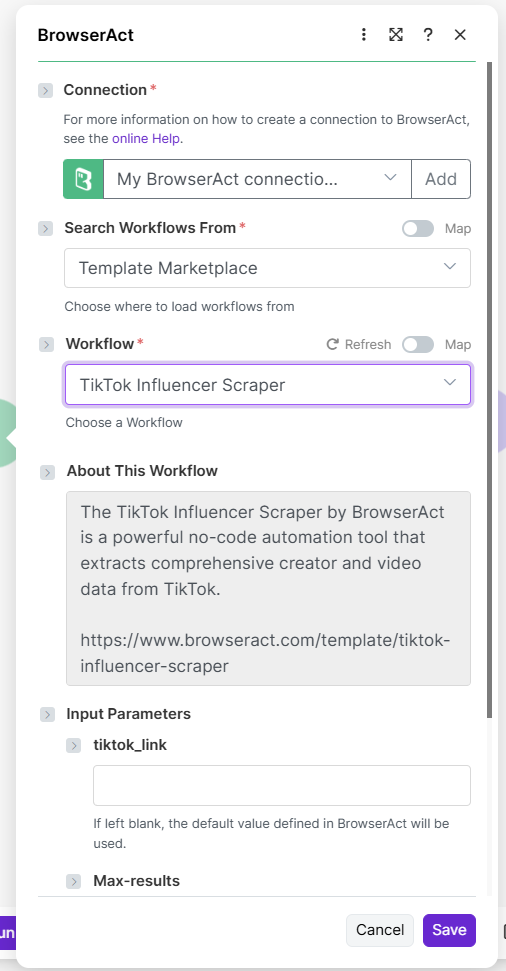
🚀Integration Steps
Step 1: Create a New Scenario (or Open Existing)
- Log into Make
- Click “Create a new scenario” (or open an existing one)
- Add your trigger module (Scheduler, Webhook, Google Sheets, etc.)
Step 2: Add BrowserAct Module
- Click “Add module” after your trigger or another module
- Search for “BrowserAct”
- Click to add the BrowserAct module to your scenario
Step 3: Connect Your Account
- In the BrowserAct module, click the Connection dropdown
- Select “Create a new connection”
- Enter your BrowserAct API key
- Click Save to connect
Step 4: Choose Your Workflow
- Make sure Action is set to
Run a workflow - Choose Search Workflows From:
- My Workflows – Your own workflows (most common)
- Template Marketplace – Pre-built templates (optional)
- Select your BrowserAct workflow from the dropdown list
Step 5: Map Input Parameters
After choosing a workflow, Make shows all input parameters it needs (like “City”, “URL”, “Keyword”, etc). For each parameter:- Enter a fixed value (if the same every time), OR
- Click the input field and map from previous modules:
- From scheduler? Use fixed value or timestamp
- From spreadsheet? Map the column
- From webhook? Map the received field
- From CRM? Map the contact field
Step 6: Test the Integration
- Click “Run once” button to test the module
- Make will execute BrowserAct with your test parameters
- You’ll see the output panel showing your scraped data
- If you see results, you’re ready! If there’s an error, check troubleshooting below
Step 7: Deploy & Activate Scenario
- Click “OK” to accept the test results
- Click the toggle switch in the top-right to turn on your scenario
- Your Make scenario is now live and will run automatically!
Step 8: Add Downstream Modules (Optional)
Now that your BrowserAct module runs, add more modules after it:- Google Sheets – Add rows with results
- Slack – Send messages with data
- Email – Email the results
- Airtable – Create records
- Notion – Create database entries
- Salesforce – Create leads/opportunities
- Filter – Conditional logic for branching