

Video Tutorial
 Watch Build Your First Workflow in 5 Minutes on YouTube.
1. Create a Workflow Built Bot
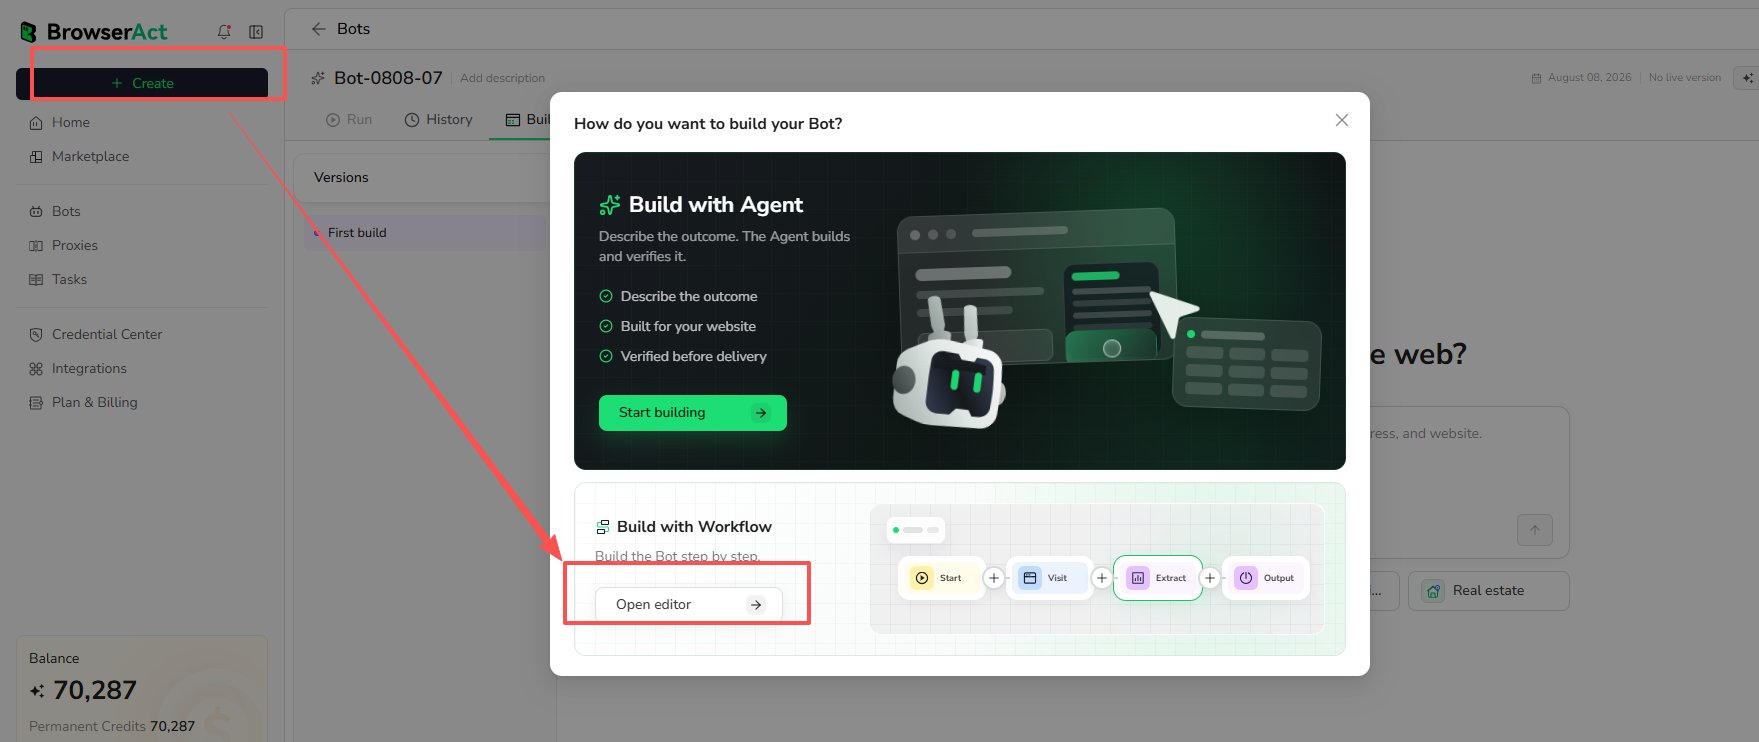
- Select
Create. - Under
Build with Workflow, selectOpen editor.
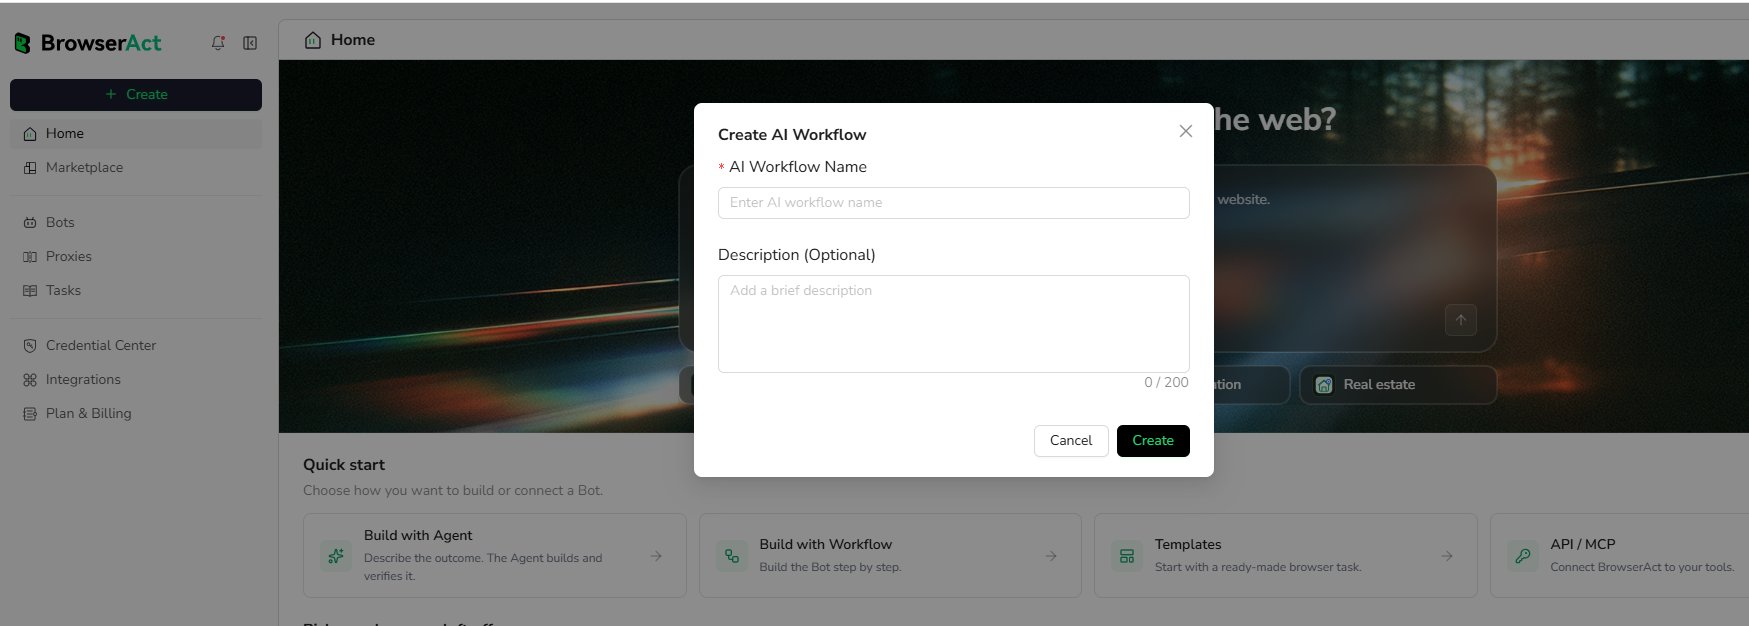
- Enter an
AI Workflow Nameand an optional description. - Select
Createto open the Workflow Builder.
2. Build the Workflow: Google Maps Example
A Workflow connects nodes that represent the actions you would perform on a real website. For example, use a Visit Page node when you need to open a page, and use a Click Element node when you need to click a button. This tutorial uses Google Maps to demonstrate the complete process. The Bot searches for restaurants in a selected location and extracts structured data from the results. Inputs- Country: e.g.,
USA - Area: e.g.,
Avalon, CA
- Open
https://www.google.com/maps - Search
{Country} {Area} - Click search icon
- Click Nearby
- Click Restaurant
- Extract list data
namefull_addressstar_ratingreview_countaverage_price_per_person_range
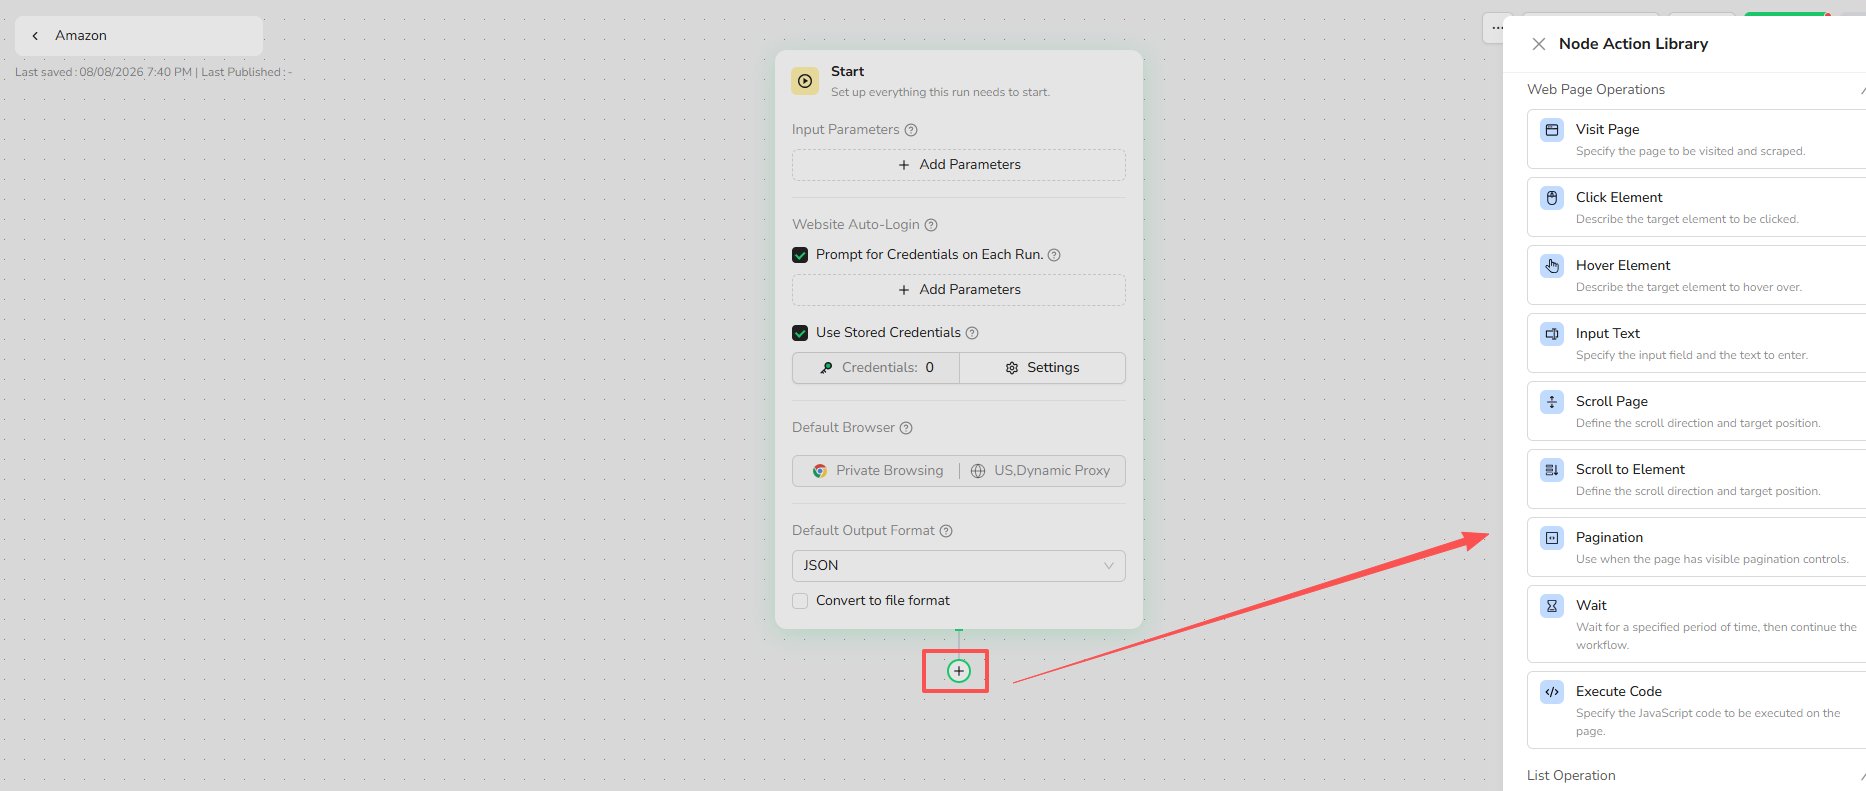
Step 1 - Start Node: Define Input Parameters
- On the canvas, click the Start node.
- In Input Parameters, add:
- Name:
Country| Default Value:USA - Name:
Area| Default Value:Avalon, CA
- Name:
Step 2 - Visit Page: Open Google Maps
- Click + on the canvas (or right-click) and choose Visit Page.
- Connect it after Start.
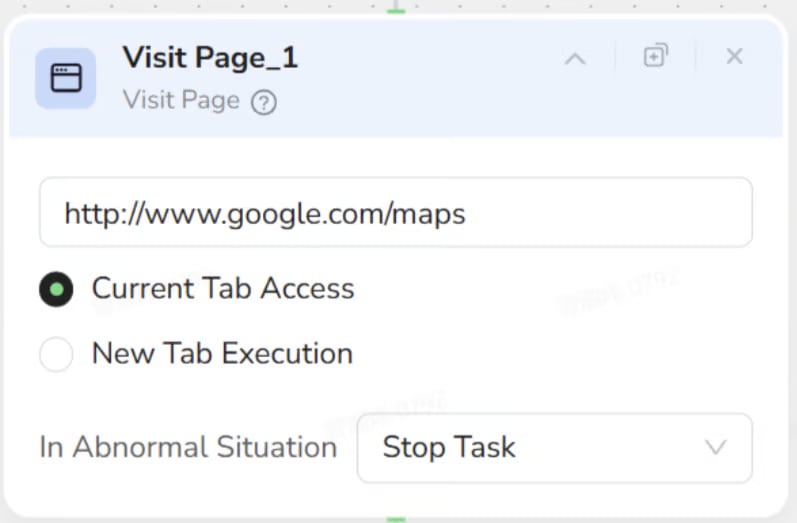
-
Set URL to:
Step 3 - Input Text: Search for the Location
- Add an Input Text node and connect it after Visit Page.
- In the page preview/selector, target the top search bar.
- In Text to Input, enter: Country Area (This references the Start parameters).
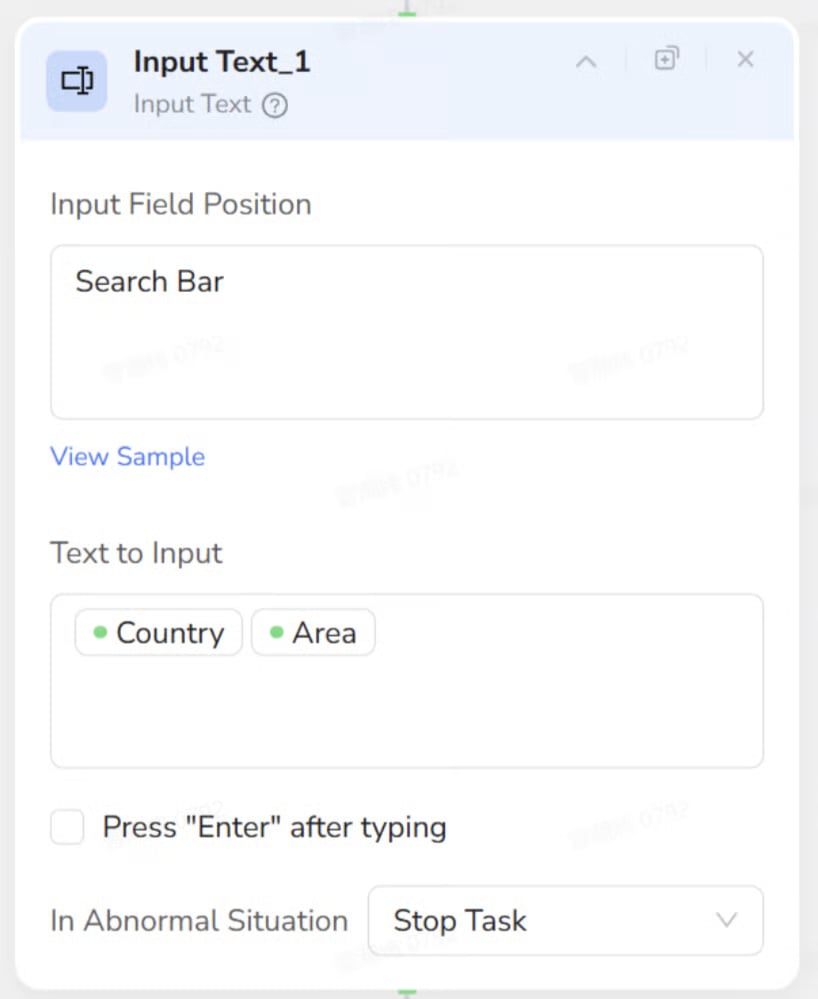
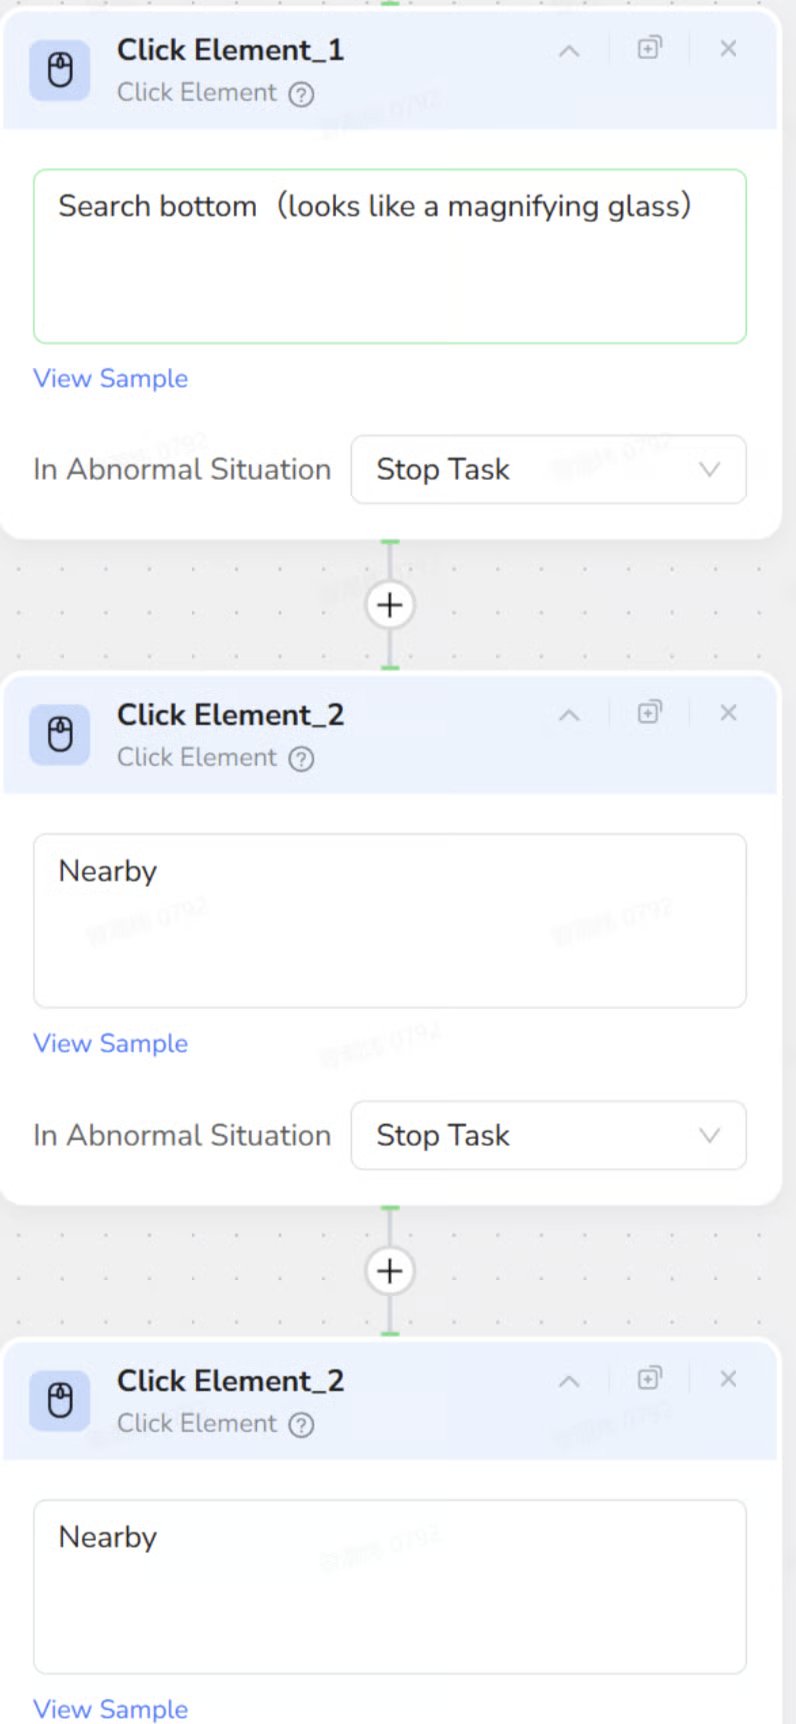
Step 4 - Click Element: Navigate to Restaurants
Use one or more Click Element nodes to perform these three clicks in order:- Search: Click the magnifying-glass icon.
- Nearby: Click the
Nearbybutton. - Restaurant: Click the
Restaurantcategory.
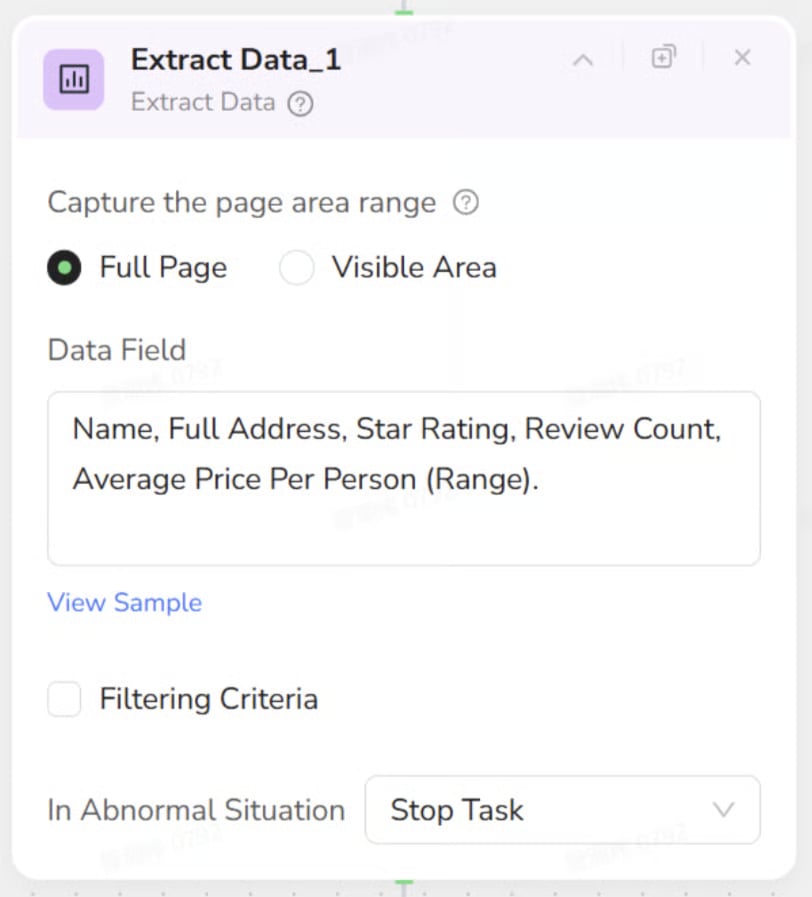
Step 5 - Extract Data: Scrape the Restaurant List
- Add an Extract Data node after the last Click Element node.
- In the left restaurant list, select one full restaurant item as the sample.
- Configure fields to extract:
namefull_addressstar_ratingreview_countaverage_price_per_person_range
3. Publish & Run
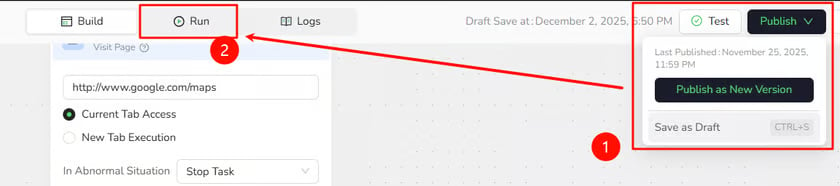
Before executing the workflow, ensure your latest changes are saved and versioned.- Publish Version: Click the Publish button (top-right corner) and select Publish as New Version to save your current configuration.
- Enter Run Mode: Click the Run tab (located next to the Build tab).
- Set Parameters:
- Country:
USA - Area:
Avalon, CA
- Country:
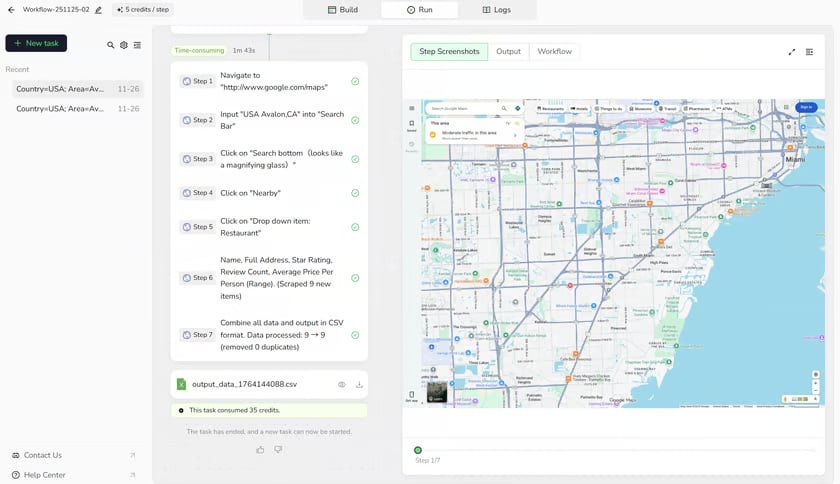
- Execute: Click Start Run and watch the nodes execute one by one.
- All steps show Succeeded / ✔.
- The run result shows a downloadable CSV file.
- The CSV contains rows like:
4. Common Roadblocks (Quick Fixes)
- CSV is empty or has very few rows:
- Check the sample in Extract Data: it should be a full list item, not a tiny sub-element.
- Wait for load: Add a short wait before Extract Data if the list loads slowly.
- Click Element does nothing:
- Re-select the actual clickable element (button/text) in the Click Element node.
- Confirm node order: Search → Nearby → Restaurant.
- Run error and not sure why:
- Check URL in Visit Page is exactly
https://www.google.com/maps. - Ensure Run parameters (Country/Area) are filled.
- Ensure no node has missing config (Click Element, etc.).
- Check URL in Visit Page is exactly
Need Help?
If the issue continues, contact BrowserAct Support or create a ticket in Discord. Include:- A short description of your goal
- A screenshot of the error
- The Task ID
Next Steps
Run the Bot again with different input values to confirm that the workflow can be reused for other locations. For example:
Once the workflow runs successfully with new inputs, continue to Node Types to learn how to build other browser interactions, or see Run a Workflow Built Bot for more ways to run and review a Bot.