

How Workflow Built Works
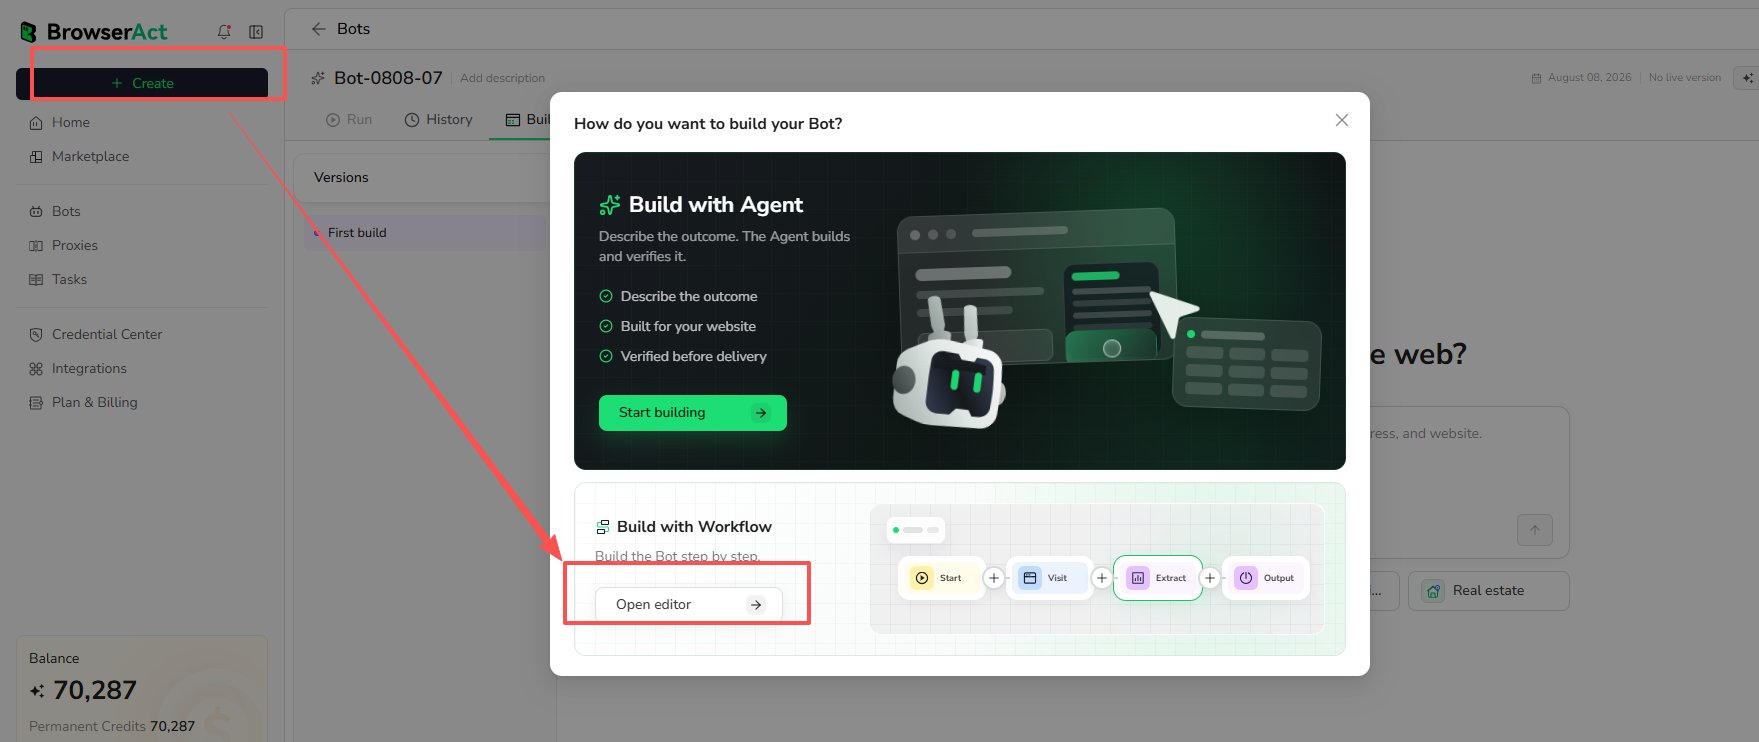
1. Open the Workflow Builder
SelectCreate, find Build with Workflow, and select Open editor.
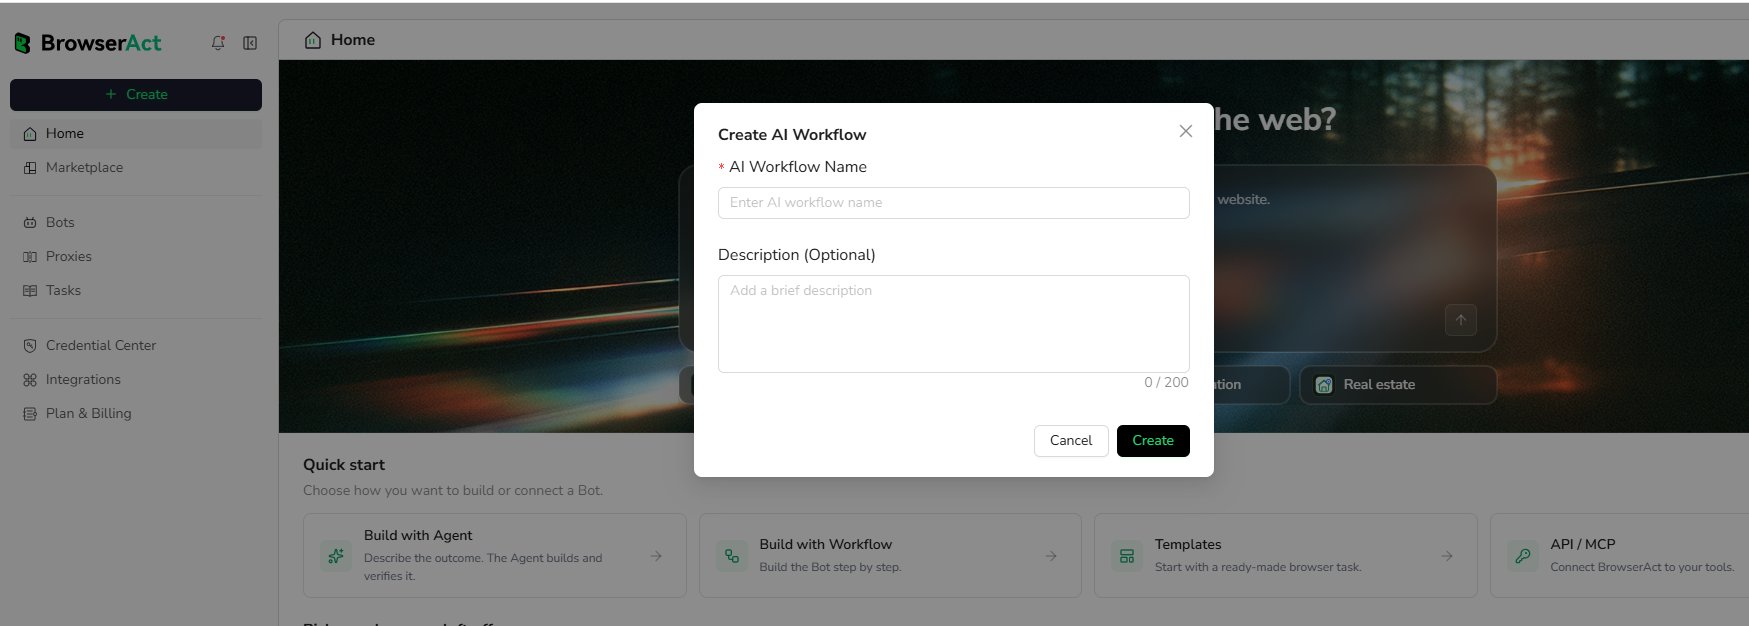
2. Create the Workflow
Enter anAI Workflow Name, add an optional description, and select Create.
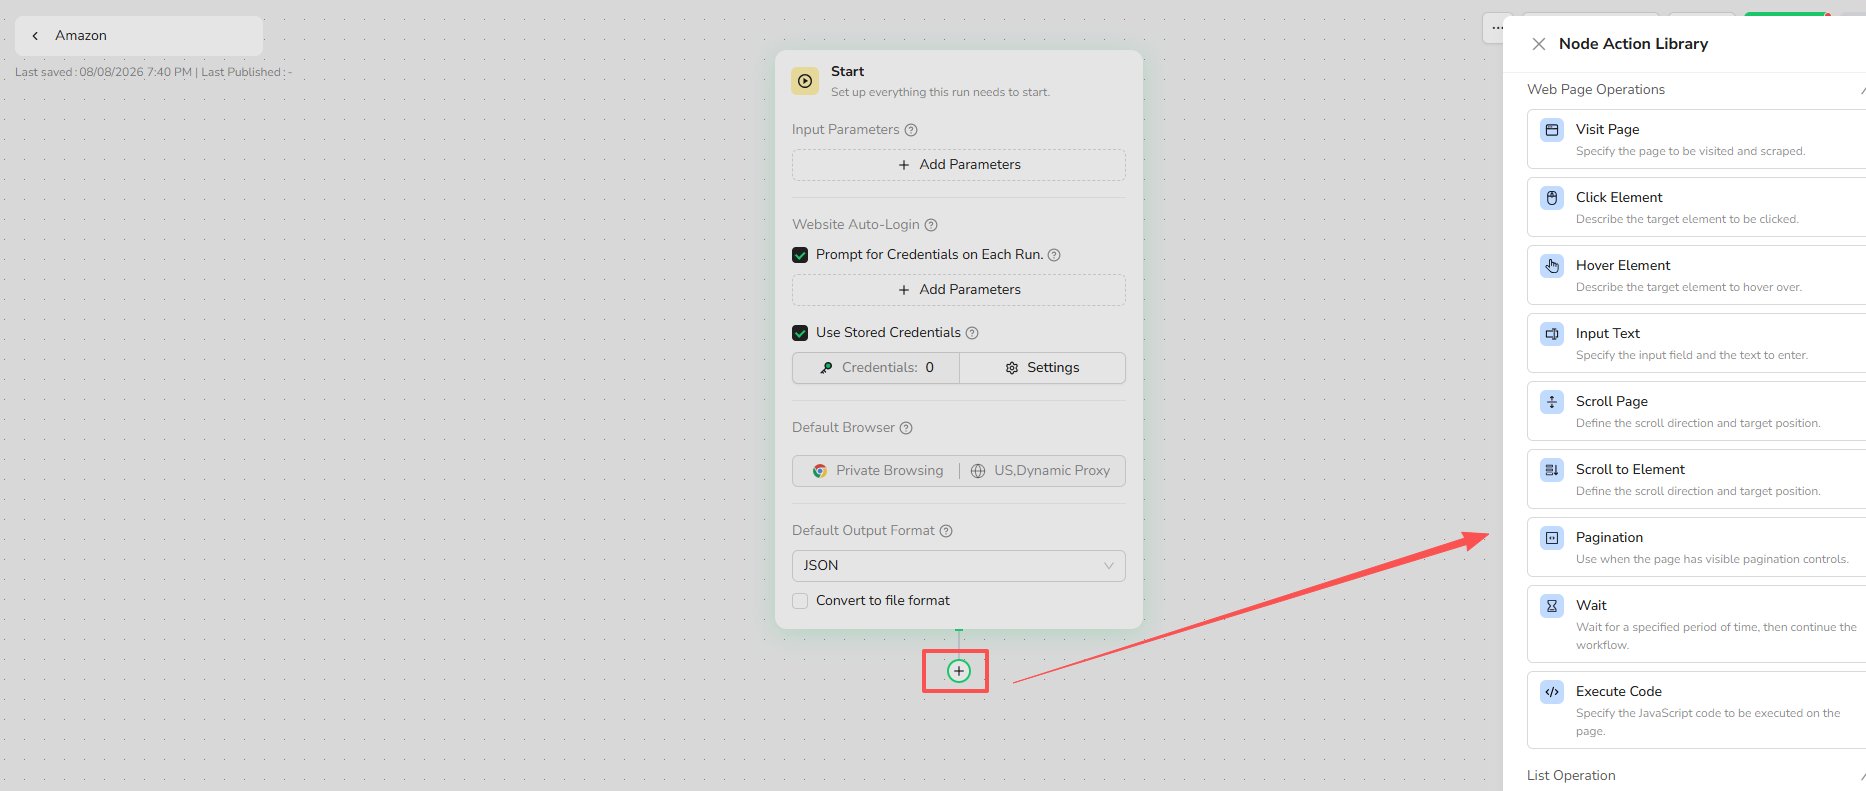
3. Configure the Start Node
Use the Start node to configure the settings the Bot needs before its first action:- Input parameters
- Supported website credentials or login prompts
- Default browser mode and proxy region
- Default output format
4. Add and Configure Nodes
Select the+ below a node to open the Node Action Library. Add the browser actions, data operations, conditions, loops, and output nodes required for the task.
Mapping Manual Actions to Nodes
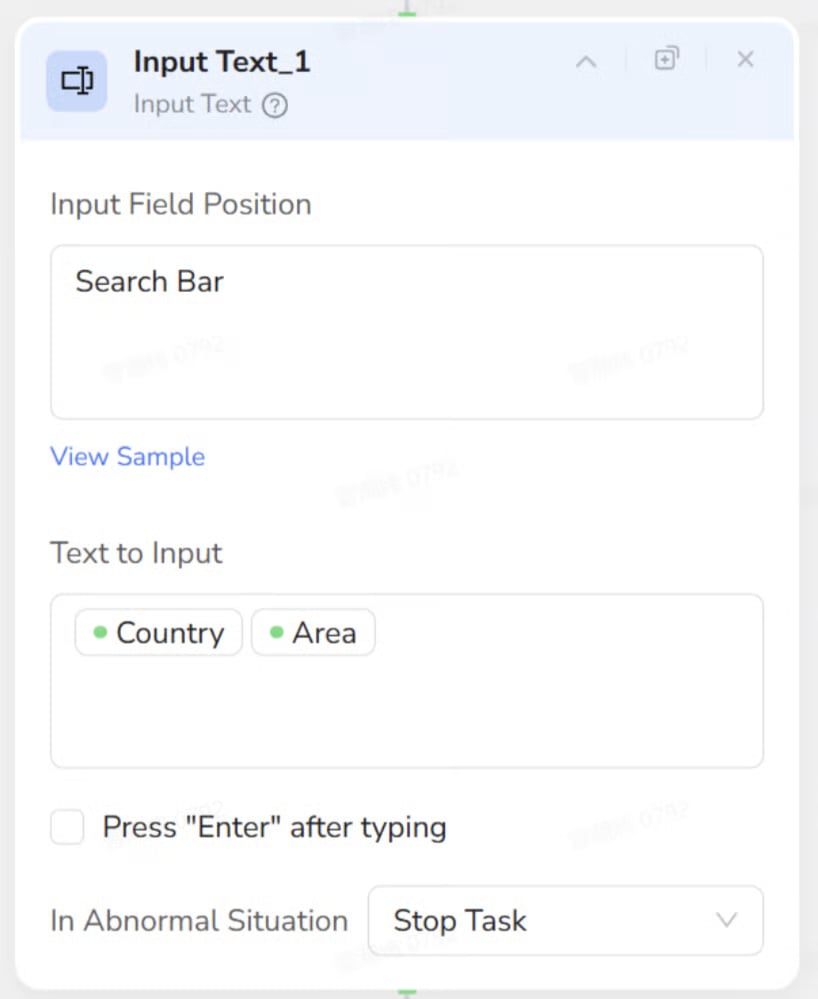
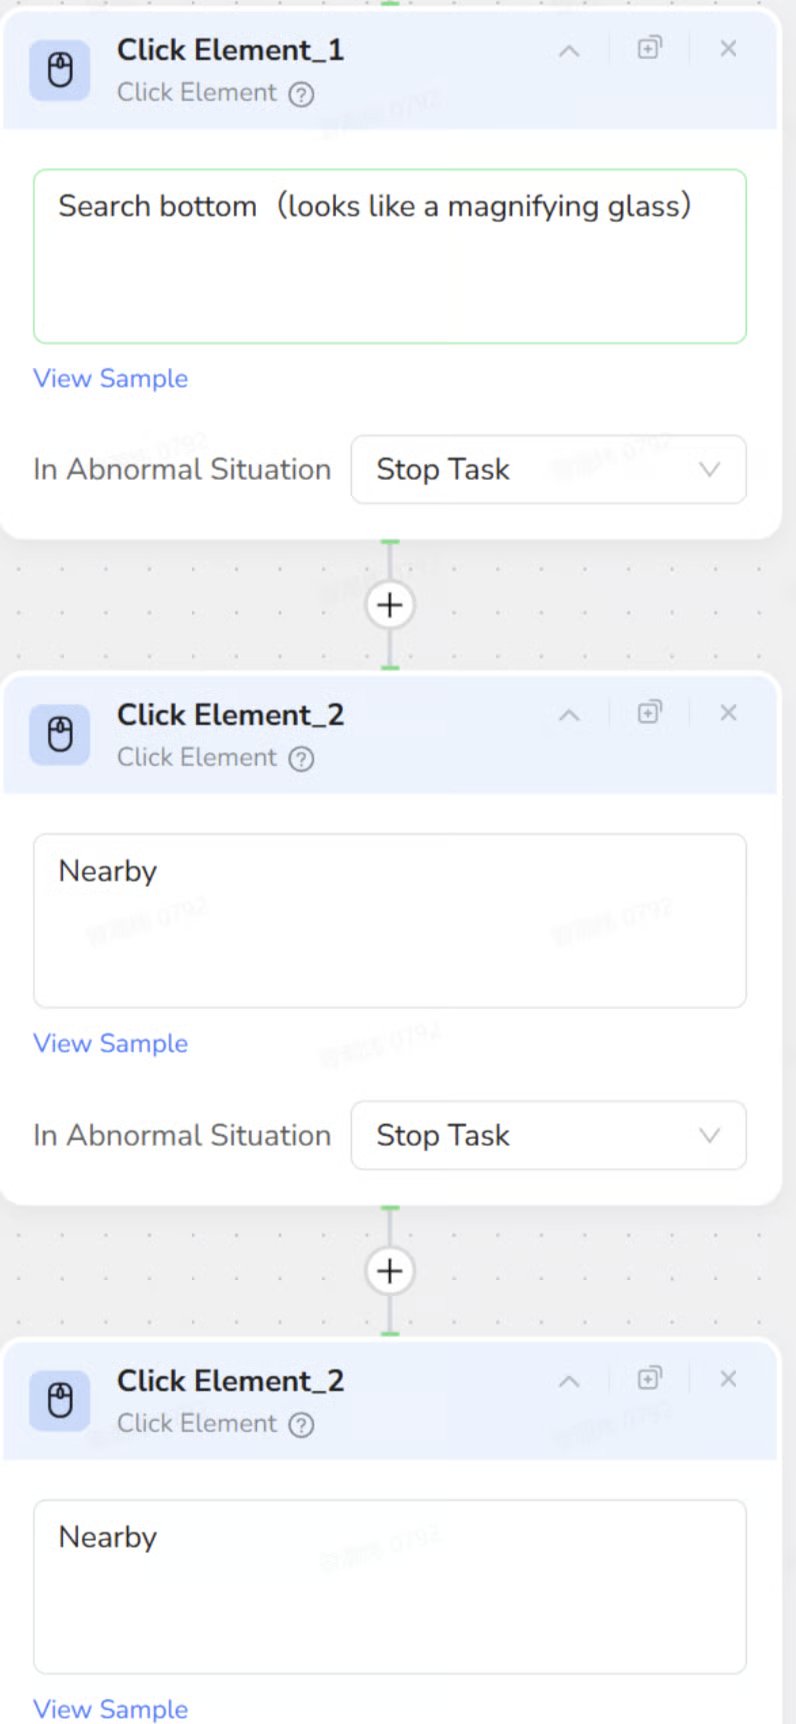
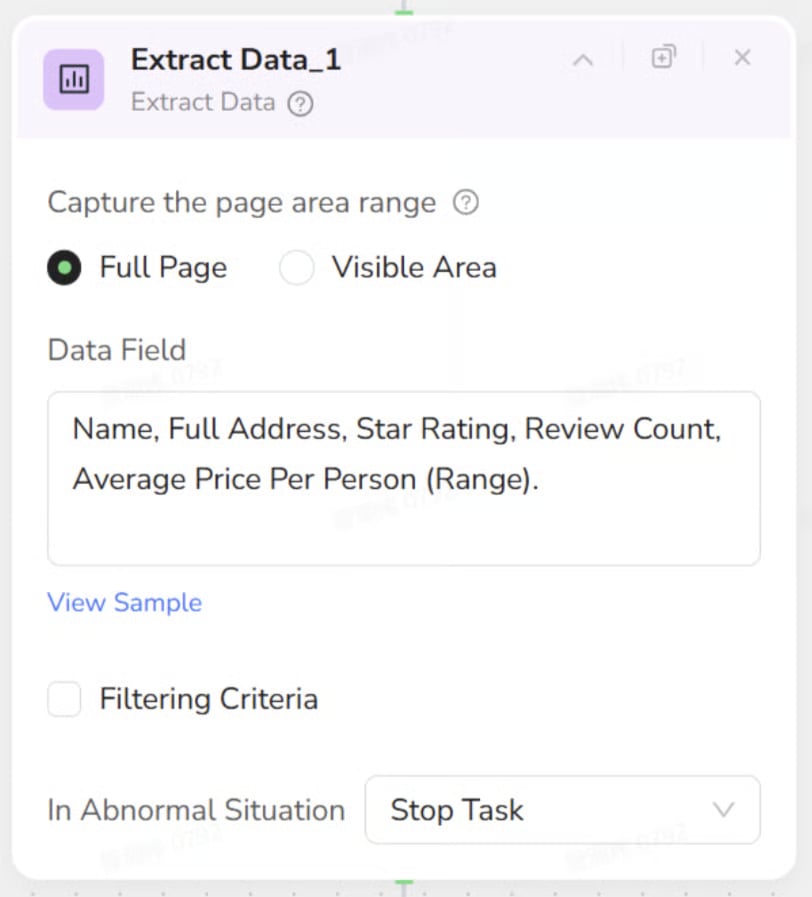
To automate a web task, map each manual browser interaction to a BrowserAct node:
Key distinction: A Workflow defines what the business goal is, while Nodes define how the browser executes each step technically.
Node Examples
Visit Page opens the target URL.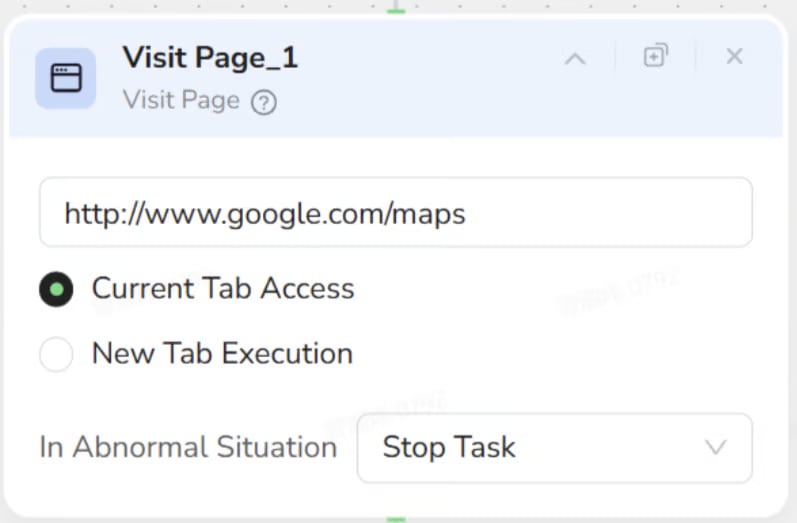
5. Test, Publish, and Run
Test the workflow and correct any failed steps. When the result is ready, publish the Bot and run it with the required inputs. After publishing, the automation is managed and run as a Bot. New runs use its latest published version.Common Building Blocks
- Start: Define input parameters used by the Bot.
- Browser nodes: Visit pages, click elements, enter text, scroll, wait, and manage tabs.
- Logic nodes: Add conditions, loops, list iteration, and pagination.
- Extraction nodes: Extract page data or data from the current list item.
- Start: Define the Bot inputs, browser settings, and default output format.
Workflow Built or Agent Built?
- Choose Workflow Built when you want to define and control each step in the visual builder.
- Choose Agent Built when you want to describe the data you need and let BrowserAct explore and build the extraction path.