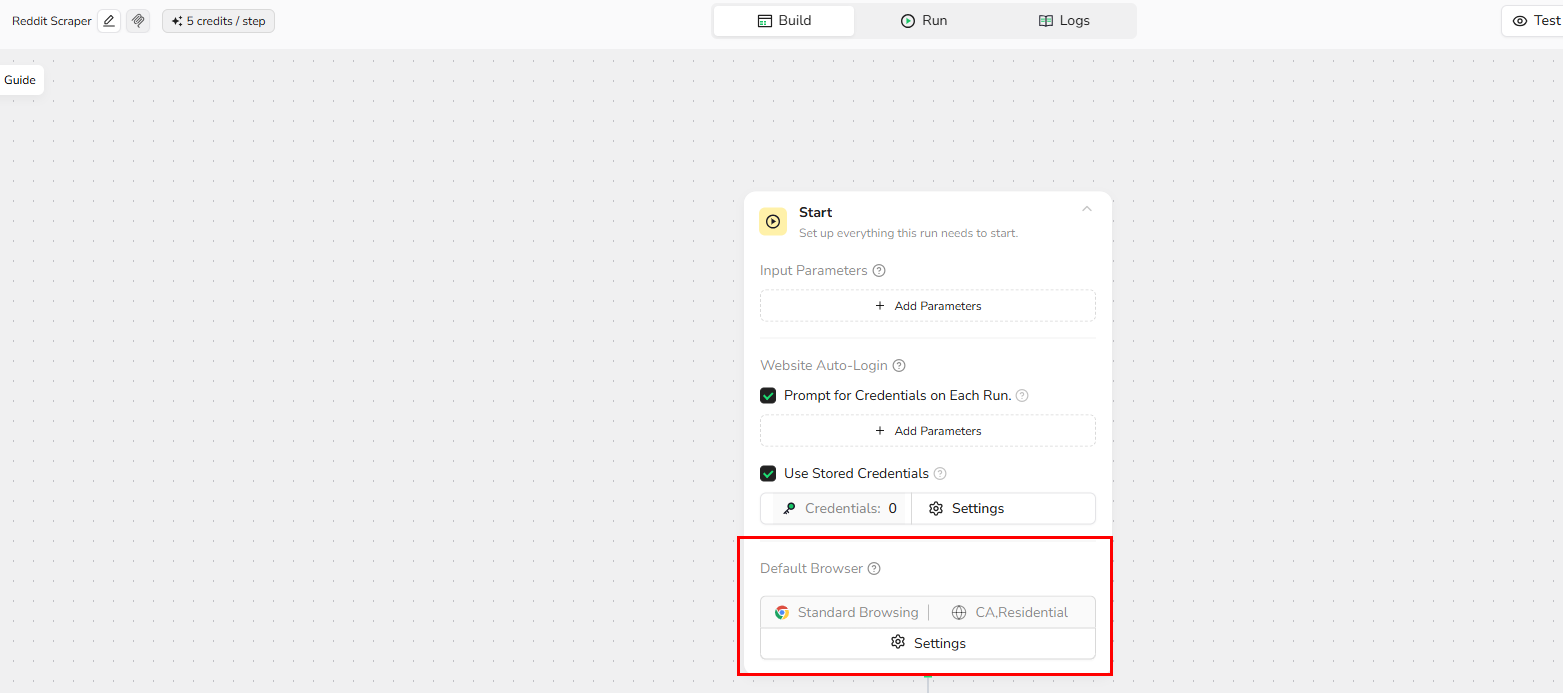
1. Open Browser Settings
To access browser configuration:- Open the Start node in the workflow editor
- Locate Default Browser Settings at the bottom of the Start node
- Click Settings to open the browser configuration panel
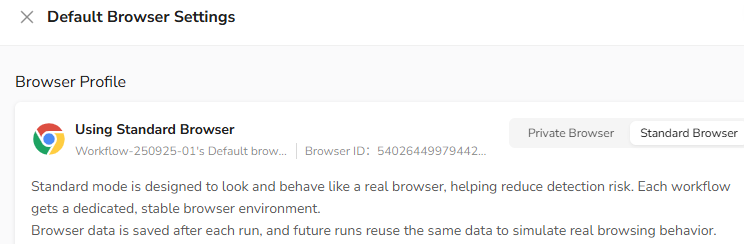
2. Choose Browser Mode
Select how BrowserAct manages browser data and sessions for your workflow.Standard Browser( Default)
Persistent browser sessions across runs Each workflow gets a dedicated and stable browser environment Cookies, cache, and login state are automatically preserved Best for- Logged-in accounts
- Long-running automation tasks
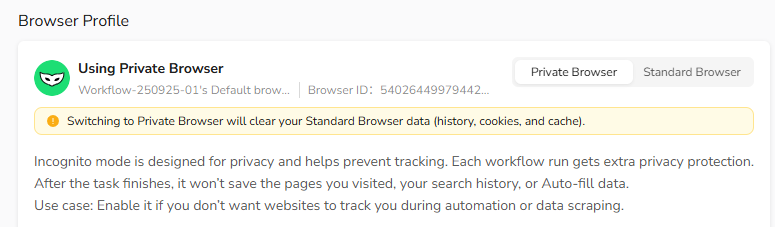
Private Browser
Use Private Browser only if:- You are scraping public pages
- Logging is not required
- Each run should start with a clean environment
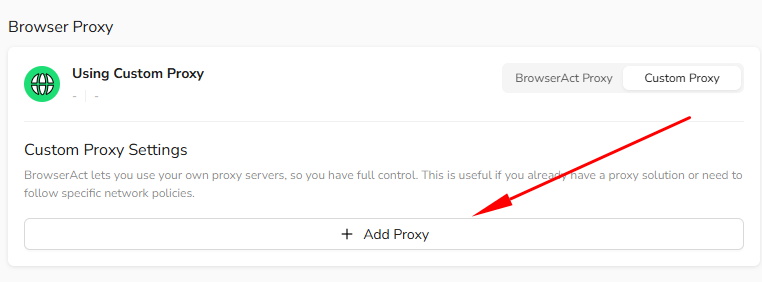
3. Configure Proxy
BrowserAct supports two proxy options, allowing you to control IP location and network identity.- BrowserAct Proxy:
- Built-in global residential proxy network
- Automatically assigns a new IP on each run
- Select a country or region directly — no manual setup required
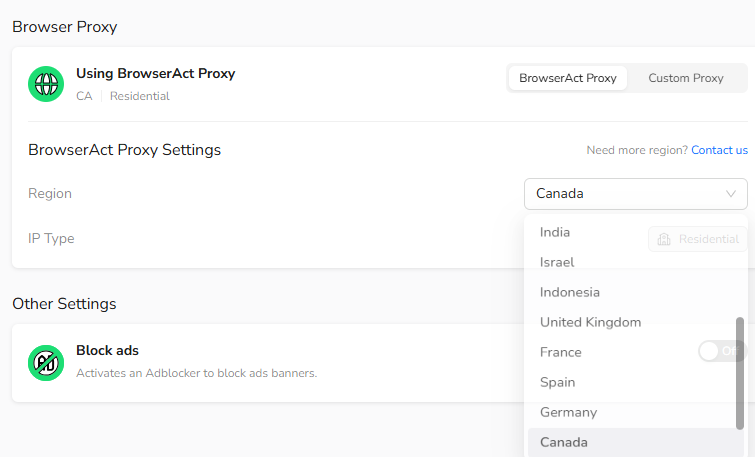
- Add your preferred HTTP or SOCKS5 proxy
- Supports authentication and custom endpoints
- Includes Proxy Check to validate connectivity before running tasks
4.Save Your Settings
After completing your configuration, **always click **Save in the bottom-right corner to apply changes.
Unsaved settings will not take effect.
One-line takeaway
Standard Browser + BrowserAct Proxy → Save → Run.You’re ready to execute your workflow.